
Quick Start
Quick Start
The shortest path from a fresh install to “one song playing with a prompter.” It takes about 15 minutes.
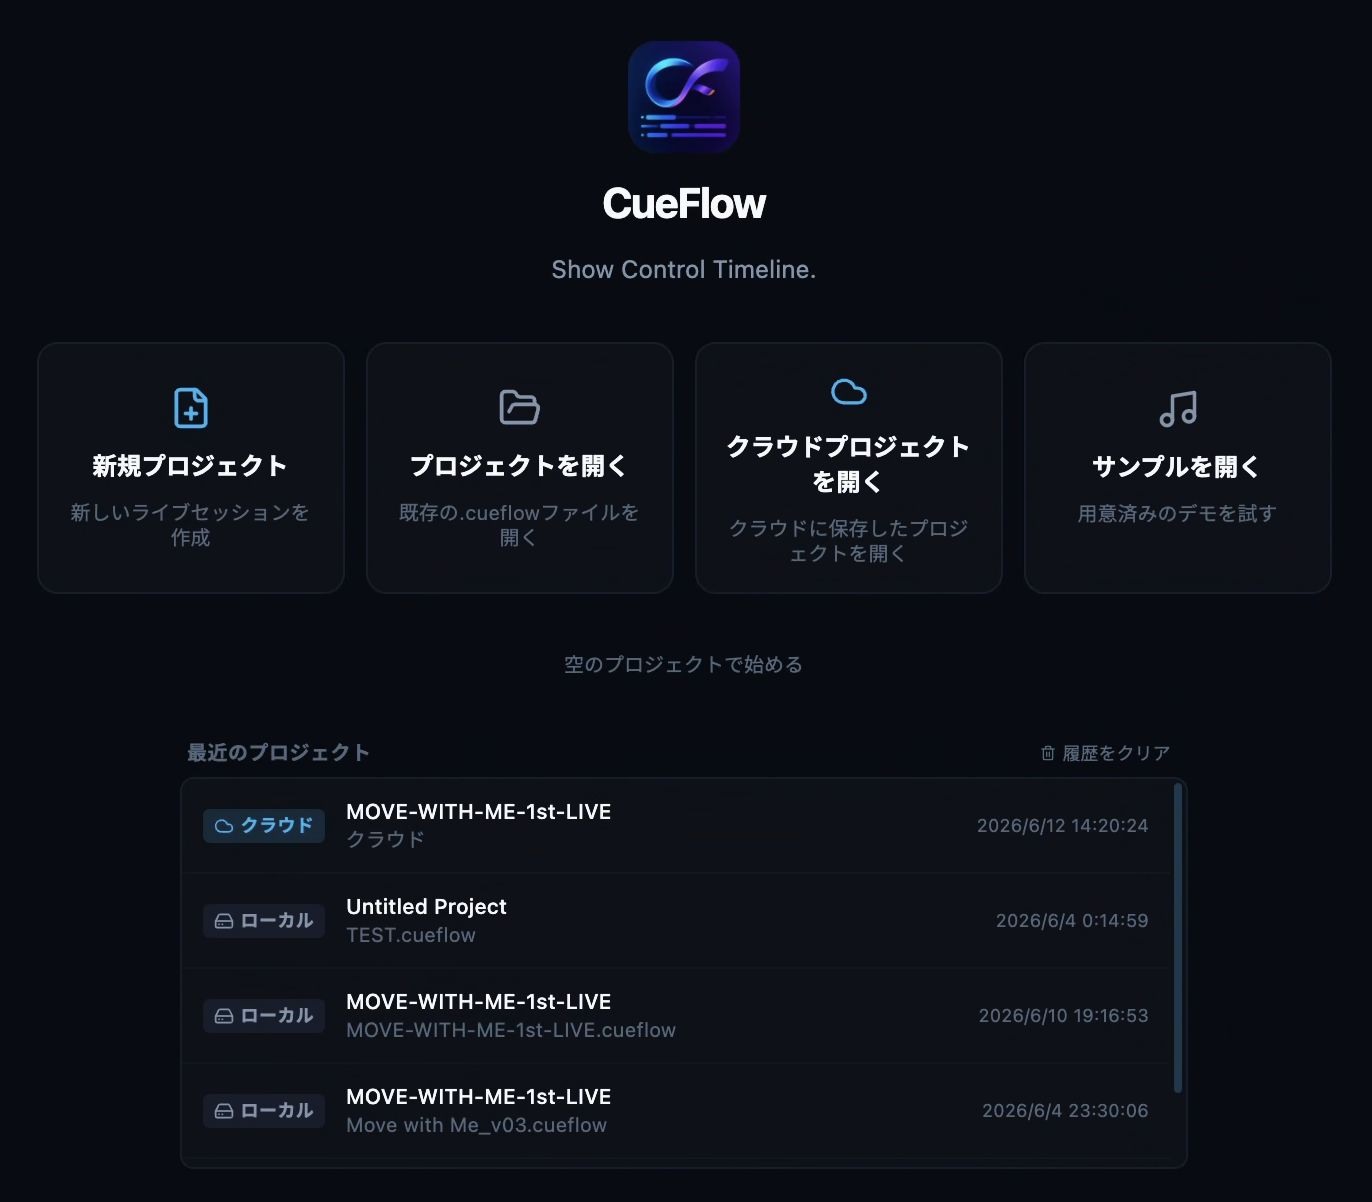
- Download and launch Get the macOS / Windows installer from the official download page and install it. The app runs as Free even without a registered license (limited to 2 audio tracks, no multichannel, and no AI / cloud / timecode sync). To unlock everything, open Settings (gear icon) → “Plan & License (License & Usage)” and enter your activation key. One license activates on up to 2 machines by default. If you do not have the key at hand, reissue it on the web License Recovery page. See Organizations & Plans for details.
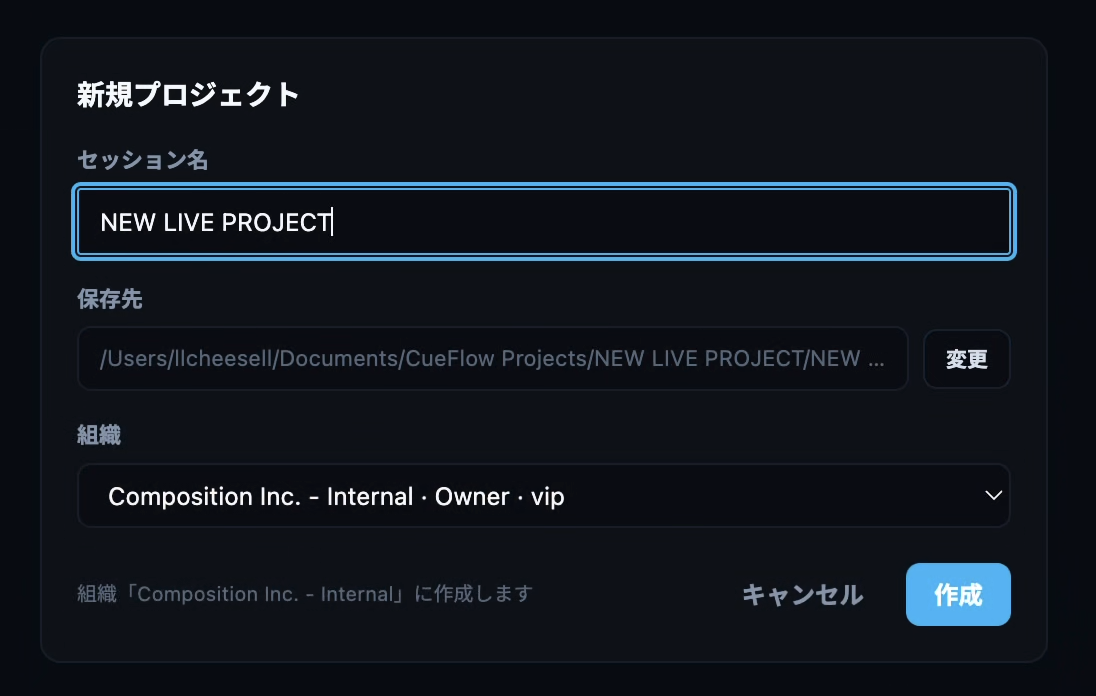
- Create a new project Open the new-project screen from “New” on the welcome screen, or File → New Project (⌘N / Ctrl+N). Set the session name, save location (default Documents/CueFlow Projects/), and organization. The “Enable cloud project” checkbox next to the organization picker defaults on. Turn it off to create an organization-owned local project: AI usage and billing are attributed to that organization, but the project does not sync or join cloud co-editing. Projects are saved as .cueflow, with audio and prompter images managed inside the project folder under Audio/ and Assets/.
- Add a song and drop audio In the setlist panel, click “+ → Add Song” to open the Song Importer and drop your audio files (WAV / MP3 / M4A, etc.). The song title and artist are pre-filled from the file name and the duration is detected automatically. Pick performers here, or add them later in the song inspector.
- Define sections Double-click the section band at the top of the timeline to create sections such as Verse, Chorus, and Bridge. Drag the edges to adjust the range, and set the name and color in the inspector. Sections also drive prompter and Memory Locations navigation.
- Add prompt blocks Double-click the prompter lane in the timeline to create a prompt block and type the lyrics in the inspector. Each text line becomes one prompter line, and every line can be assigned an attribute (lyric / guide / direction / image) and performers. Press ⌘B to split a block at the playhead.
- Open the prompter window The Prompter View at the top of the inspector previews the show display. From the Prompter Server popover in the header, choose “pop out” to open a standalone prompter window you can move to a second display and make full screen — without sharing it on the network.
- Save the project Save with ⌘S / Ctrl+S. To carry the project to another computer, use File → “Save Project with Assets...”, which bundles the .cueflow file together with Audio/, Assets/, and Waveforms/ into a single folder that opens without relinking.
- (Optional) Save to the cloud and co-edit If you belong to an organization on the Team (or Enterprise) plan, leave “Enable cloud project” on when creating the project, or enable it later from the cloud button in the header. From then on ⌘S saves on this machine first and then saves to the cloud. If the cloud save cannot complete, CueFlow keeps the local save and shows that the project is not yet synced to the cloud. Anyone in the organization — or anyone who accepts an invite — can open the latest version on any device. Several people can edit at once: changes appear in real time and nothing is lost. Change your display name and avatar in Settings (gear icon) → “Cloud Collaboration.” See the Cloud Collaboration and Organizations & Plans pages for details.
If you cannot find your key
If you lost your license key, or need to free the activation slot on a PC you no longer have, you can reissue the key and deactivate devices yourself on the web License Recovery page. It emails a recovery link to your registered address, so it works even when you cannot activate the app. Open License Recovery →
Tip
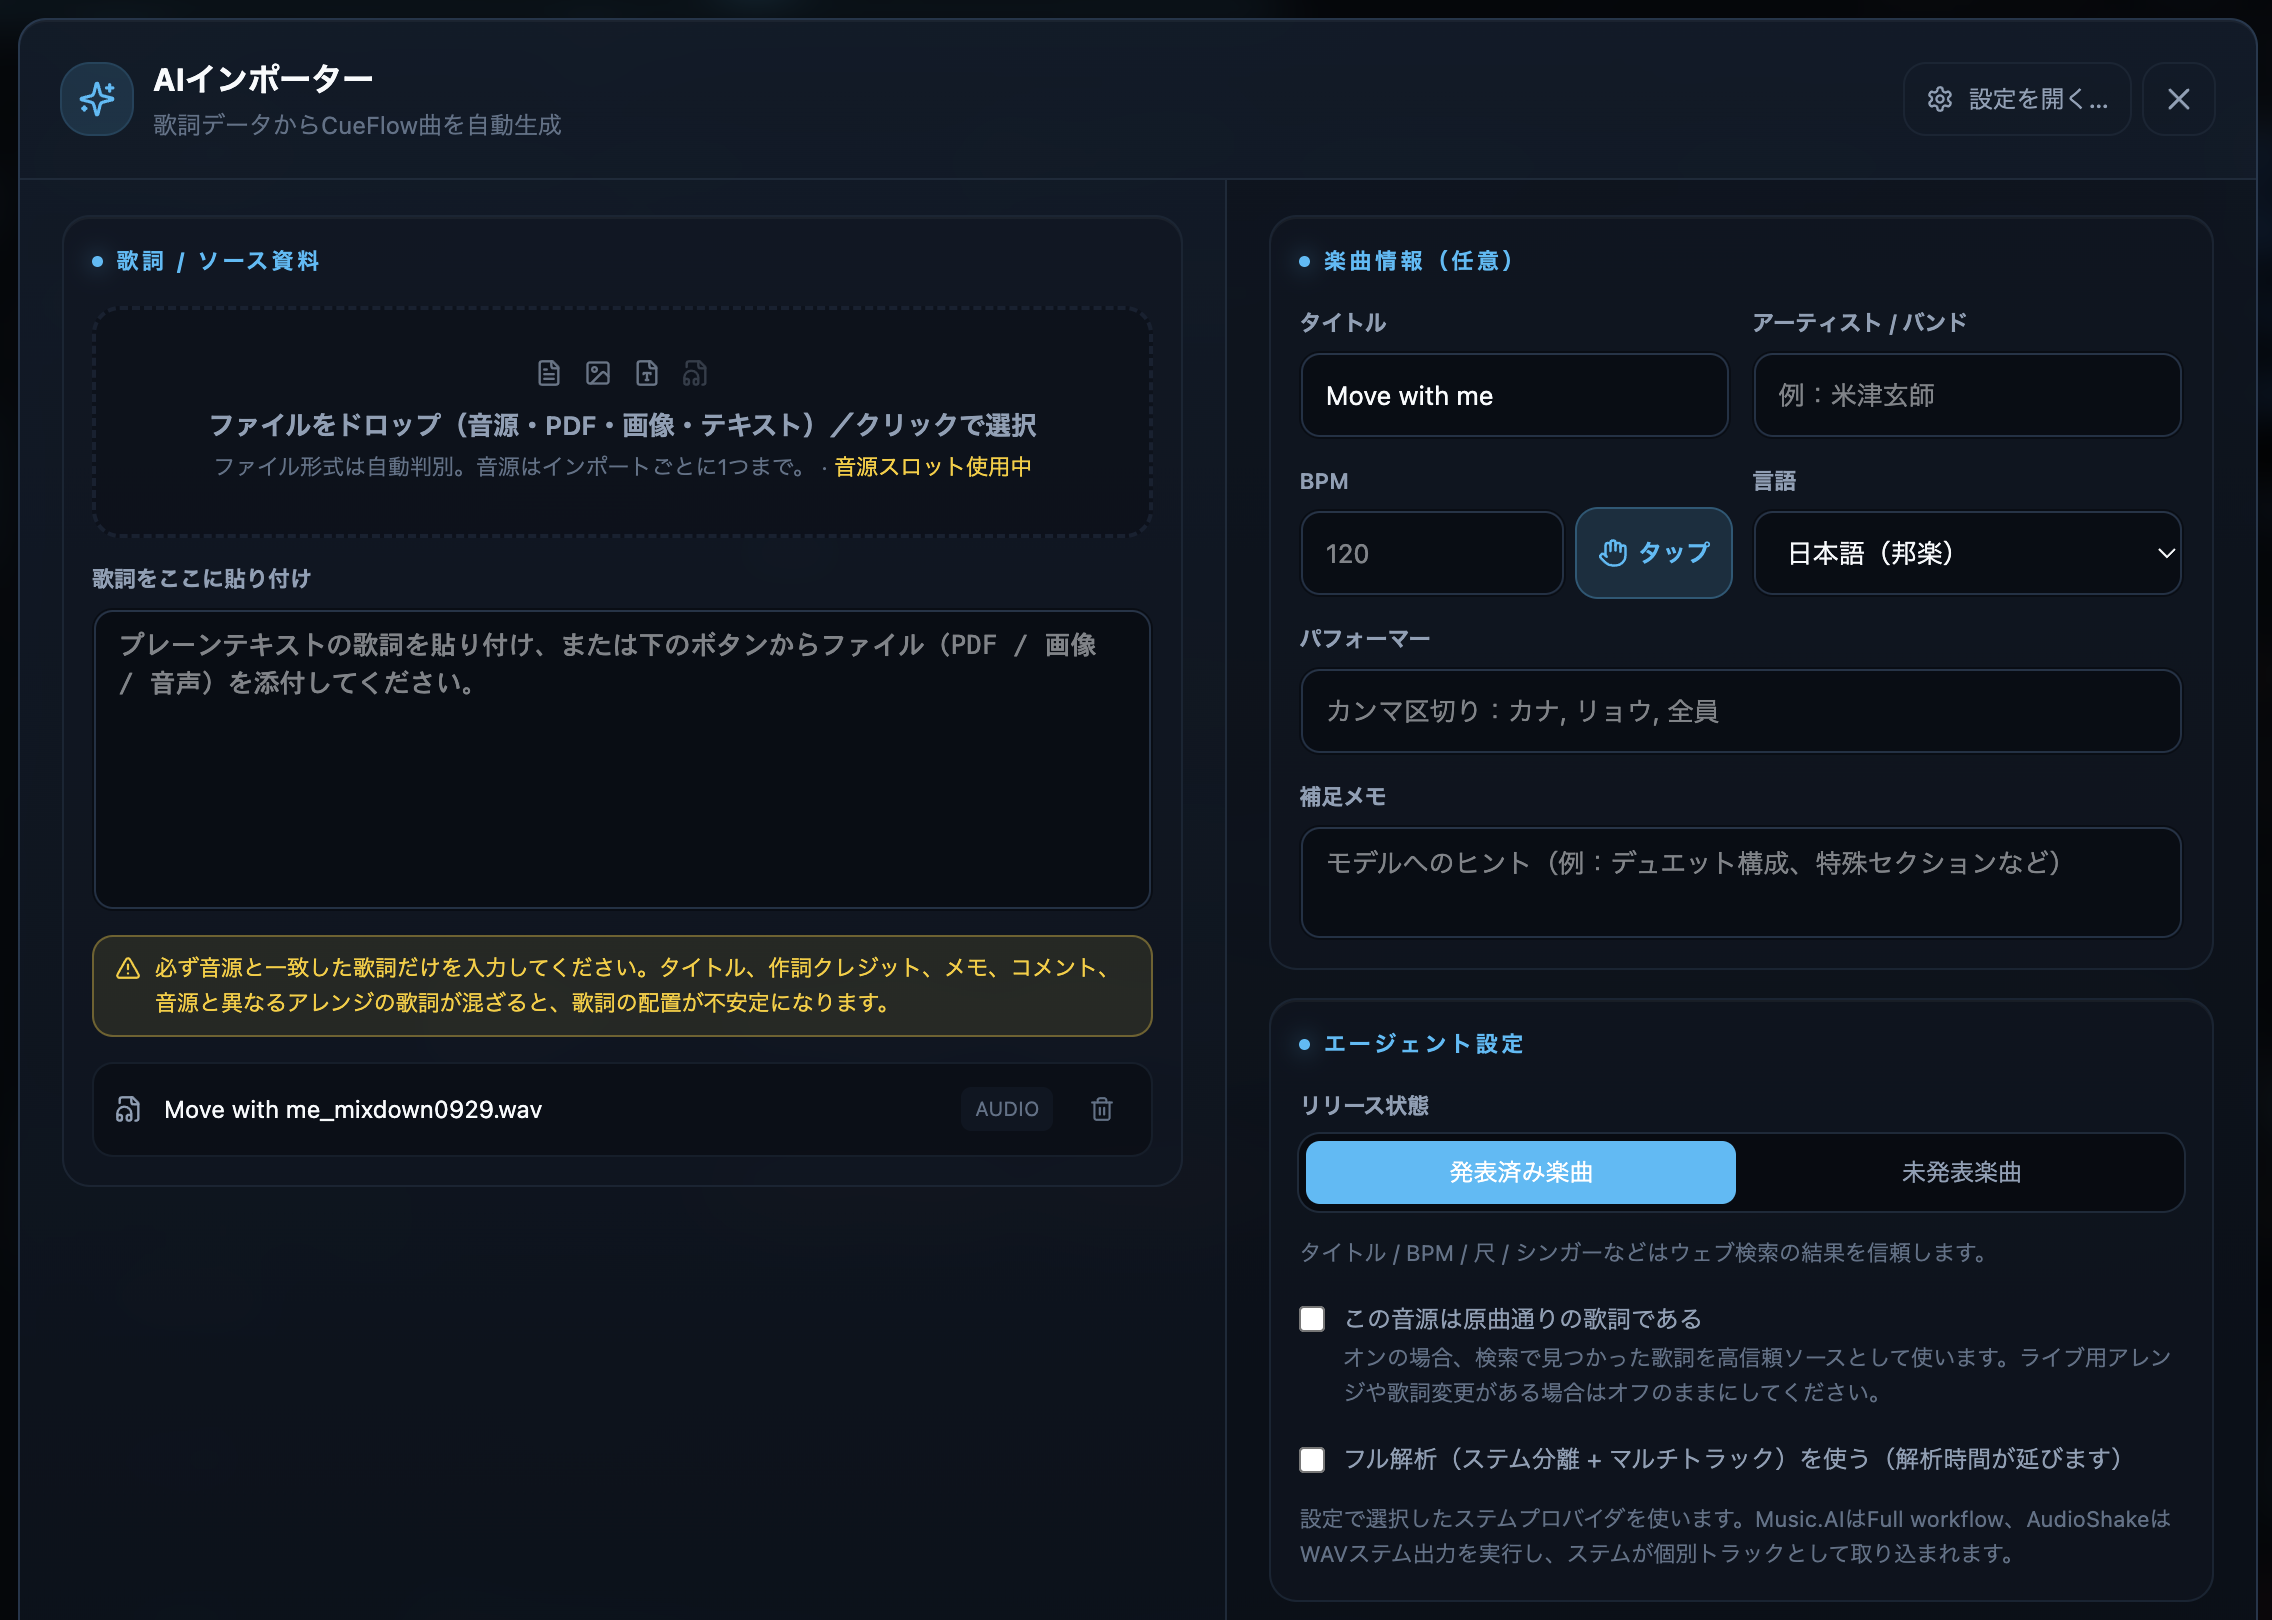
To spin up a song from lyrics or audio in one go, use “✨ Add from Lyrics (AI Importer)” in the setlist panel. Feed it lyric text, images, PDFs, or audio and it builds the title, lyrics, tempo, and per-line performer assignment automatically. Entering the artist name and BPM by hand where known improves accuracy.
Next steps
See “Interface Overview” for the names of every part of the main window, and “Timeline Editing” for clip editing in depth. Before a show, we also recommend skimming the keyboard shortcut list.